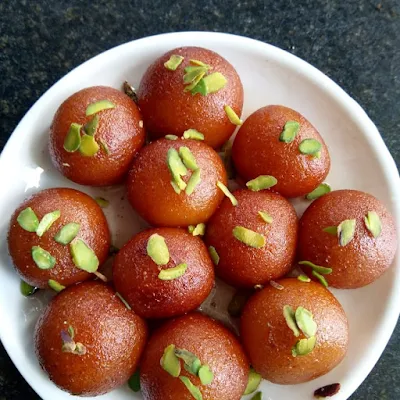
If you’re looking to recreate this magical sweet at home, you’re in the right place. In this blog, I’ll walk you through an authentic Gulab Jamun recipe, packed with tips and tricks to make them perfectly soft, juicy, and melt-in-the-mouth.
Let’s get started!
What is Gulab Jamun?
Before we dive into the recipe, a little background: Gulab Jamun comes from Persian words where "Gulab" means rose water and "Jamun" refers to a small, dark fruit native to India. True to its name, Gulab Jamun is flavored with rose-scented sugar syrup and has a rich, indulgent texture.
Traditionally, these balls are made from khoya (reduced milk solids) and then deep-fried to a golden brown before being soaked in aromatic sugar syrup. Over time, shortcuts like milk powder-based versions have also become popular without compromising too much on taste.
Ingredients for Gulab Jamun
For the Gulab Jamun Dough:
1 cup khoya (or milk powder as an alternative)
1/4 cup all-purpose flour (maida)
1/8 teaspoon baking soda
2 tablespoons milk (add as needed)
1 tablespoon ghee (clarified butter)
For the Sugar Syrup:
2 cups sugar
1 1/2 cups water
1 teaspoon rose water
3-4 cardamom pods (lightly crushed)
A few strands of saffron (optional)
1 teaspoon lemon juice (prevents crystallization)
For Frying:
Ghee or neutral oil
Step-by-Step Gulab Jamun Recipe
Step 1: Preparing the Sugar Syrup
In a deep pan, add sugar and water.
Heat the mixture on a medium flame, stirring until the sugar dissolves completely.
Add the cardamom pods, saffron strands, and let it simmer for about 4-5 minutes until slightly sticky. (It should not form a thread.)
Add rose water and lemon juice, then switch off the flame.
Keep the syrup warm, not hot.
Step 2: Making the Dough
If using khoya, crumble it finely. If using milk powder, mix it with flour and baking soda.
Add ghee and mix well until it looks crumbly.
Gradually add milk little by little to form a soft, smooth dough. It should be pliable but not sticky.
Cover the dough with a damp cloth and let it rest for 10 minutes.
Step 3: Shaping the Gulab Jamuns
Divide the dough into equal portions (about the size of a small lemon).
Roll each piece into a smooth ball without cracks. Cracks can cause them to break during frying.
Keep the balls covered with a moist cloth to prevent drying.
Step 4: Frying the Balls
Heat ghee or oil in a deep pan over a low flame. It should not be smoking hot.
Test by dropping a small piece of dough; it should rise slowly, not immediately turn brown.
Fry 4-5 balls at a time. Stir gently and continuously for even coloring.
Fry until they are uniformly golden brown.
Tip: Be patient! Low and slow frying is the secret to fully cooked, soft Gulab Jamuns.
Step 5: Soaking in Syrup
Remove the fried balls and immediately drop them into the warm sugar syrup.
Let them soak for at least 2-3 hours for best results. They will swell and soak up the syrup beautifully.
Pro Tips for the Best Gulab Jamuns
Soft Dough: Don’t over-knead; just enough to bring the dough together.
Temperature Control: Always fry on low to medium heat to avoid raw centers.
Right Syrup Consistency: If the syrup is too thick, it won’t absorb. If too thin, Gulab Jamun may break.
Resting Time: Letting them soak longer makes them softer and juicier.
Variations You Can Try
Stuffed Gulab Jamun: Add chopped nuts or saffron-flavored mawa inside the balls for a rich surprise.
Kala Jamun: A darker version made by adding a little sugar or paneer to the dough and frying until deep brown.
Baked Gulab Jamun: For a healthier twist, you can bake instead of deep-frying (though taste will differ slightly).
Why Homemade Gulab Jamun is Special
Nothing beats the satisfaction of making this royal dessert at home. You control the quality of ingredients, adjust sweetness, and enjoy the process. Plus, the aroma of cardamom and rose syrup filling your kitchen is an experience in itself!
Homemade Gulab Jamun is softer, fresher, and more flavorful than many store-bought options—and it makes every festival or celebration even more memorable.
Final Thoughts
Making Gulab Jamun may seem intimidating at first, but once you try it, you’ll realize it’s much easier than it looks. With a little practice and the right technique, you can master this classic sweet and earn endless compliments from family and friends.
So next time you crave something sweet, don’t reach for a box—roll up your sleeves, follow this simple recipe, and create magic in your kitchen!
Happy Cooking and Happy Eating!


.jpeg)


.jpeg)
.jpeg)

.jpeg)
.jpeg)
0 Comments